Flourless Chocolate Cake
IMG_744001

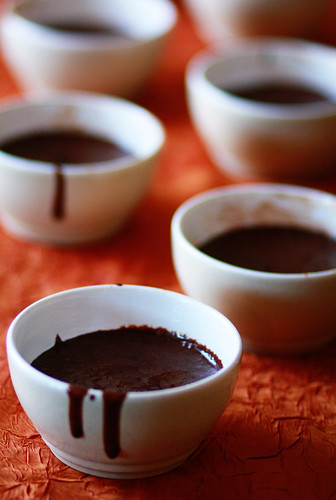
That's what I made for my birthday cake this year. I am certain that I could subsist on Flourless Chocolate Cake alone.

I make my cake in little glass bowls because it's easier for me that way. Springforms and I aren't really on talking terms. Besides, they're prettier this way.

I ate one of the little cakes for breakfast this morning. Because I wanted to. And it made me happy.

Have you ever made Flourless Chocolate cake?

It will complete you.

Oh, be sure to use a recipe that calls for coffee. Trust me.

*Posts from 1 year ago today: The Penny and PBS For The First Time

Labels:

Gingersnap Cookies
IMG_533301

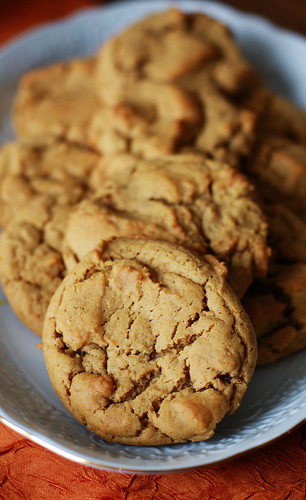
I made these Gingersnap cookies this afternoon, only a half a batch because that was all the butter I had on hand. (You do understand I was in a tizzy because I was out of butter. This does not happen to me!)

Once they were all made I decided to try a cookie out; I only do this on rare occasions, but since I was sending some to go along with Eve's teacher's dinner, I figured I'd take one for the team and make sure they were fit for consumption.

I took a bite and then promptly melted into the floor in a puddle of love. I proposed on the spot; Mr. Gingersnap accepted, we are getting married immediatly.

These cookies are the perfect blend of soft and chewy; when you add in the ultimate Fall flavors of ginger, clove, and cinnamon, you have perfection in tan. Really, you need to make these; your life will not be complete until you do.

I must include little bits of FYI-ness because I can not follow a recipe word for word. I just can't. I've tried. I should seek counseling but I'm too busy inhaling Gingersnap cookies to be bothered with it.

Anyways, the FYIs...

When I made the cookies I upped the cloves, cinnamon, and ginger a 1/4 teaspoon each simply because I love that burst of flavor. I didn't add the butterscotch chips in because we don't choose to eat the sugar they are made with, and because the cookies don't need a thing, except if you're feeling fancy you could sprinkle some Turbinado sugar on top.

Oh, one more thing... I creamed the livin' daylights out of the butter/sugar mixture; doing that seems to help make a prettier cookie. I'm nothing if not technical.

Happy Gingersnap cookie making!

Labels:

VBlog: How to make Chicken Broth
Well, hello very first Vblog ever!

You'd think I am a full blooded Italian with all the hand waving that went on. I'm not. I don't even have a drop of Italian in me. Maybe the Lebanese wave their hands around a lot?? Anyways... Below the video I am including all the details I forgot, as well as a written recipe for the broth.


Sorry about the florescent light thing. It was either have them on or not see me; it was a dark and stormy day, yesterday.

Details:

I used an 8 quart pot, filled 3/4 of the way with filtered water.

After I assembled all the ingredients into the pot, I brought it to a boil and then reduced it to a low simmer for what ended up being 4 hours. It was only that long because I forgot about it. Two hours would have been fine since my chicken was already cooked.

I tried to pretty much leave it alone but I'm a compulsive stirrer. I just can't help myself!

IMG_527401

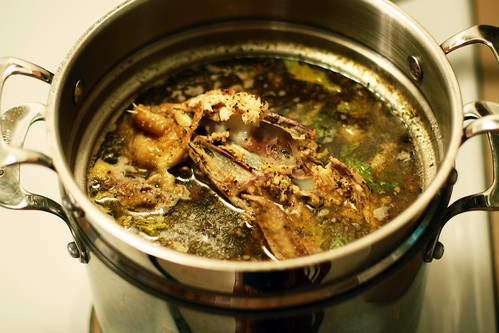
This is the broth about 2 hours into the cooking.

Recipe:

1 cooked chicken carcass with meat taken off (or a bunch of bones from a cut up chicken would be fine too)

6 or so quarts water

4-6 carrots chunked up

1 heart of celery chunked up

7 cloves garlic

2 sprigs fresh Rosemary or 1 Tablespoon (more if you like the flavor)

4 sprigs fresh Thyme or 1 Tablespoon dried

1 Tablespoon salt (you can also do less if you want, waiting until the end to add it)

1 teaspoon black pepper

1 Tablespoon dried Sage (or 5 or 5 fresh leaves)

1 Tablespoon Onion Powder

After the broth is cooked and cooled, if you you weren't using a pot with an insert like I was, you'll need to strain the broth. After you do that, divide it up into quart size Ziploc - 2 cups each- don't forget to mark them! Stick those in your freezer and you have convenient, cheap, delicious chicken broth.

Enjoy!!

*Post from 1 year ago today: She's Baaack!

Labels:

Buy One Get One Free: Cinnamon Roll and Honey Oatmeal Whole Wheat Bread
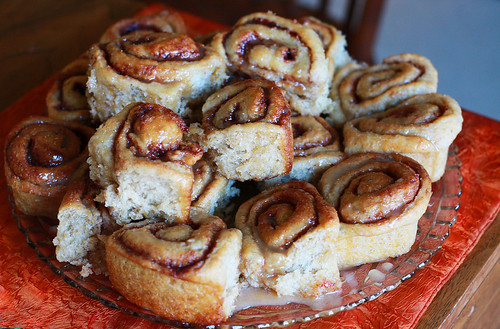
This is such a simple recipe; simple but not quick. It's worth the time, though. These cinnamon rolls are deeply satisfying and very filling. I made mine yesterday and warmed them in my oven for eating this morning. It worked out perfectly.

For these cinnamon rolls I use my mom's bread recipe as the base. This bread recipe is really, really special; my mom has been making this for as long as I can remember and I have been making it for over seven years myself. It's the only bread recipe I ever make, it's that good.

If you would like, you could make half of the dough into cinnamon rolls and the other half into regular rolls; truly, this is the most versatile recipe you could wish for.

Case in point, earlier this week I made this bread recipe and used half for cinnamon rolls and half for mushroom garlic cheese rolls. I just sweetened up the cinnamon roll part with a half a cup of sugar.

IMG_431501

This will be the base recipe for the cinnamon rolls.

Honey Oatmeal Bread:

Mix in your biggest bowl:

3 cups oats (I use 2 cups rolled, 1 cup quick)

1 1/2 cups whole wheat flour

3 tablespoon salt

6 Tablespoons oil

4 Tablespoons wheat gluten (this is optional but it will make your rolls nice and fluffy!)

Pour over top of mixed dry ingredients:

4 1/4 cups boiling water

3/4 cup honey

In a 4 cup measurer, mix gently and let rest for 5 minutes:


3 Tablespoons yeast

1 1/2 cups warm water

1 Tablespoon honey

Directions:

Mix the dry and the first set of wet ingredients together; let it cool to lukewarm (110-115 degrees). Add in yeast and water mixture. Mix well.

Add in:

5 cups whole wheat flour

5 cups white flour

Stir in flour.
Turn dough onto a well floured surface.
Knead dough for about 5 minutes, sprinkling flour over top as needed.
Continue with this process until the dough is smooth and not sticky.

Wash your big bowl and place 1/4 cup oil in the bottom.
Place dough into bowl, turn dough over and rub so that it is covered in the oil.
Cover bowl with a clean kitchen towel and let dough rise in a warm place until doubled.

Once your dough has risen, punch it down and divide into 4 pieces.

Roll out your first piece into a rectangle - about 1/4 to 1/2 inch thick.
Spread 4 tablespoons softened butter evenly onto dough - make sure to get all the way to the edges!
Cover entire rectangle with 1/2 cup of cinnamon/sugar mixture (mixture: 2 cups sugar to 1/2 cup cinnamon).

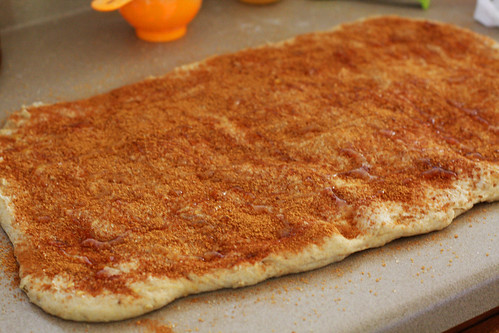
*This is optional - I always do this because I love the flavor of honey: squeeze about 1/4 cup honey over the top of cinnamon/sugar mixture in a zig zag pattern - don't spread with a knife!!

IMG_410201

Roll long ways - towards your body. Cut rolls about 2 to 2 1/2 inches wide.
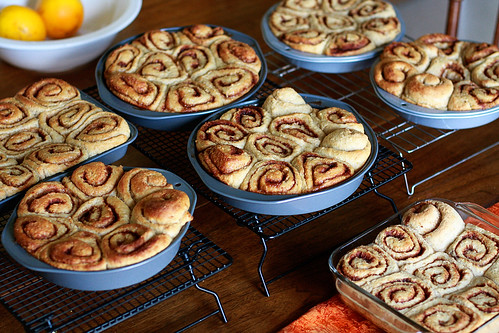
Place rolls into cake pans with melted butter in the bottom. I fit about 8-10 rolls per pan.

IMG_410601

Continue this process until all the dough is used.

Cover and let the rolls rise for about 20 minutes. Bake at 375 degrees for 15 minutes or until set in the middle.


PHEW!! Anyone still around?

These rolls are really good, you won't regret the time spent, I promise!!

Labels:

D For D and Tuesday's Recipe: Grandma Chips' Coffee Cake
If you are so inclined you can vote for me here. Thank you, thank you!

We've had a mini hiatus from Dessert for Dinner. It's been a sad time for us all. Thursday nights have felt so typical and boring. But, with Daniel TDY and the kids having tandem colds, something had to give. But now we are healthy, together, and that means... DFD is back!

IMG_266401

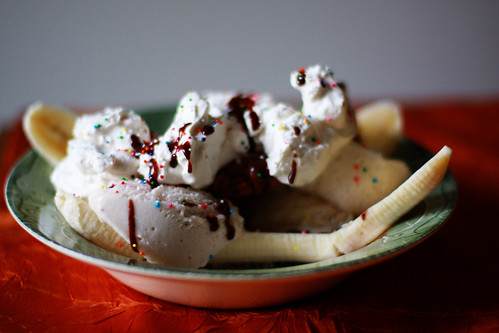
Dessert For Dinner tonight was Banana Splits. And boy, were they a HIT! They were neither elaborate or perfect but the kids didn't care. They were thrilled to have multiple scoops of ice cream and chocolate sauce. On a banana no less. The sprinkles nearly put them over the top! Life doesn't get much better than that when you are 5 and 2! Eliza skipped out tonight, though I did give her a taste or two of mine.

Alright, moving on to my Tuesday recipe on Thursday.

Technicalities, technicalities.

This is my Grandma Chip's recipe for Coffee Cake and it is evil. It draws me in with it's beauty, it's ridiculous moistness, it's perfect crumb, the addictive taste of cinnamon and sugar.... I could eat the whole pan.

No matter who I serve this to it is always devoured. This Coffee cake is sure to be a hit no matter who you are feeding!
For me it will be teachers. And because I really like them I might even bring some of my awesome and favorite Vermont coffee to compliment the cake.

I have been making the staff at Eve's school a special Friday treat. The first week it was Chocolate Chip cookies, the next was Brownies, and tomorrow it will be Coffee Cake. I also made Lemon Scones one week but that was on a Wednesday. Wow, were those were a huge hit!

Anyways, coffee cake.... Here we go!

Oh, by the way, I'll include a picture tomorrow after I make mine.

Okay... really, really, here we go:


Coffee Cake

1 cup softened butter

2 cups sugar

2 eggs

1 teaspoon vanilla

1 cup (8oz) sour cream

2 cups flour

1 teaspoon baking powder

1 teaspoon salt

For the topping(mix together):

1 cup chopped nuts (optional, of course)

1/4 brown sugar ( I use raw sugar)

1 teaspoon cinnamon

Directions:

Cream together butter, sugar, and eggs until light.

Add in: vanilla and sour cream

Mix in: flour, baking powder, and salt.

Spread half of the batter in a greased and floured 9x13 pan.

Sprinkle with half of the topping mixture.

Spread the rest of the batter over top.

Sprinkle with the remaining topping mixture.

Bake at 350 degrees for 35 to 40 minutes.

Be prepared to have your house smell like you would imagine Heaven's kitchen to smell. It's divine - the smell, the taste, everything.

Enjoy with some delicious coffee, if that's what floats your boat!

Labels:

Tuesday Recipe: Banana Bread
I know, everyone and their brother has a recipe for banana bread, but this one is different. I have traveled the world of banana bread... It has been a long and arduous journey. A journey that has not always been tasty, and very often mediocre and frequently disappointing. But then, a few years ago, I found THE recipe. It is perfection. I call it: Only the Best Banana Bread Ever.

Actually what I did was sort of meld two recipes together and also added a bit of my own thing. I made my notes on the recipe and in a moment of brilliance I taped it into my recipe book. That's where the brilliance ended. I promptly forgot it was there and I continued down the road of broken banana bread dreams. For years.

Can we all say Duh, Andrea!

Well, a couple of weeks ago I remembered what I had done with my perfect banana bread recipe! The elation was great! I promptly whipped up a batch of Only the Best Banana Bread Ever and heard the angels singing. Two days and it was gone. Oh, and Daniel was TDY. Yikes! Because I cannot keep a good thing to myself I will share it with you...

Only the Best Banana Bread Ever

5 very ripe bananas

4 eggs

1 cup butter - softened

1 cup sugar

1/2 cup honey

1 Tablespoon vanilla extract

3 1/2 cups flour
(I do 1 1/2 whole wheat, 2 white - don't judge me)

2 teaspoons baking soda

1 teaspoon baking powder

1 teaspoon salt

3 Tablespoon milk

1 teaspoon vinegar

Directions:

Preheat oven to 300 degrees

Beat eggs, butter, sugar until light and fluffy.

Add in bananas. Beat until mixed.

Add in vanilla.

Mix flour, baking soda, baking powder, salt. Add into wet ingredients.

Add in milk mixed with vinegar.

Mix until combined.

If you make this into a loaf (actually it will probably make 2), bake in a greased pan for 1 hour 10 minutes. Or until a toothpick poked into the middle comes out clean.

I make mine into muffins and mini loaves. I bake those for about 20 -25 minutes. It makes 1 pan of mini muffins, 1 pan of regular muffins, and 9 mini loaves.

This time, as in last night, I added in chocolate chips.... Those babies take it to a whole new level!

Enjoy!!

*Post from 1 year ago today: Bessie and Flower Girl

Labels:

Recipes Coming Out the Whazoo: Grilled Pizza and Blueberry Surprise
IMG_990001

Let's talk about food! I know, some of you are thinking this has become a food blog but I assure you, it has not. There are some amazing food based blogs out there and mine is not one of them. I just like to eat and then, apparently, talk about it.

Today we're discussing Dessert for Dinner, Grilled Pizza, and Blueberry Surprise....

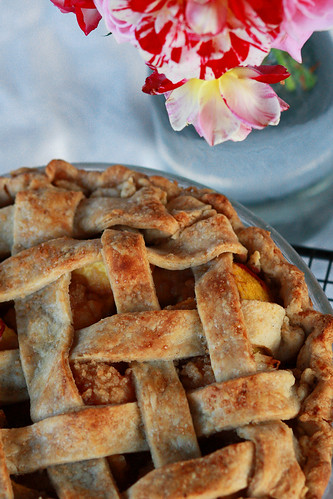
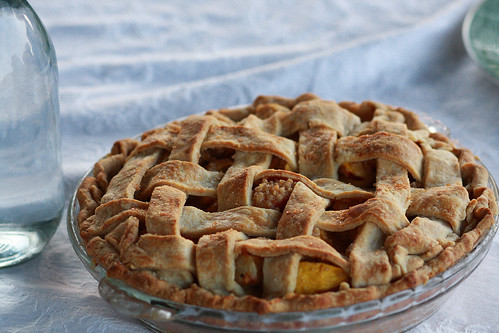
First off, let's talk about D for D. Peach Pie was the dessert and it was delicious! A little underdone, but I have never made a peach pie before so I cut myself some slack. Besides, I had hungry people breathing down my neck and the smell wafting from my oven was amazing.

Eve helped me make the pie last night and I am convinced that is why it tasted especially good.

IMG_991001


Are you ready for the recipes? Let's start with the Grilled Pizza and then we'll move on to the Blueberry Surprise.

IMG_937701


Here is the No-Rise Pizza Dough recipe:

In a medium bowl mix and let dissolve:

1 Tablespoon yeast

1 cup warm water

1 teaspoon sugar

1 teaspoon salt

2 Tablespoons oil

Add in:

2 1/2 cups flour

Mix until combine. Sprinkle flour on your counter, place dough on top and knead until a soft, not sticky ball has formed.

Easy!!

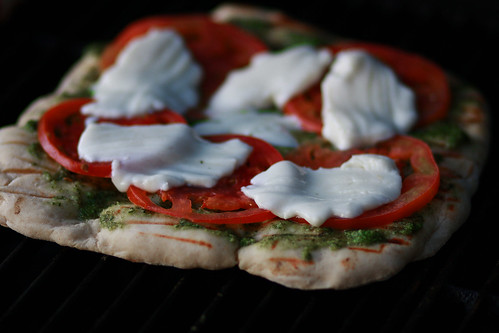
Alright, if you are making Grilled Pizza here are the directions. I followed them to a "T" which is very much unlike me, but I was nervous! For the Pesto pizza I simply layered pesto (homemade - so easy and cheap!), thinly sliced tomatoes, and fresh mozzarella.

*I think the trick to making grilled pizza is forming small pizzas. If you make them too large I can imagine they would tear and be very hard to move around on the grill.

Could that be any easier or cheap? Enjoy!

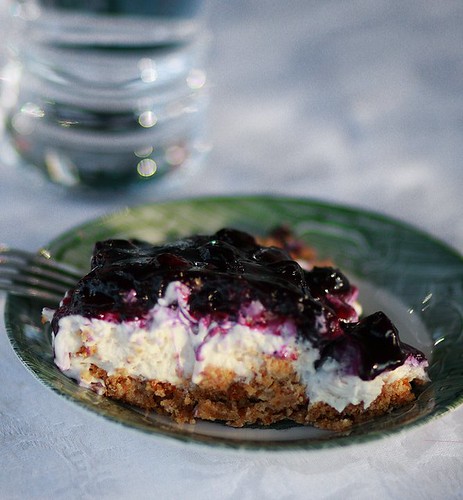
Moving on to Blueberry Surprise... This dessert is perfect for a summer evening; it is light, sweet, and simple to make. And it only takes a few ingredients which makes it even better.

IMG_871701

What you need:

Fresh blueberries
A package of cream cheese
Whipping cream/heavy cream
Butter
Graham Crackers
Cornstarch
Confectionery Sugar

First I make my graham cracker crust:

Crush 1 package graham crackers. Place crushed crackers in an 8x8 pan. Add in 6 Tablespoons of melted butter. Mix together and press into bottom of your baking dish. Press a half an inch up the sides if possible. Let this chill in refrigerator while you're mixing up the rest of the ingredients.

Whip together:

8oz. cream cheese - softened ( 1 package)

1 pint whipping cream

Gradually add in:

1 cup confectionery sugar

2 teaspoons vanilla

Whip until light, fluffy, and smooth. Pour over graham cracker crust and smooth down. Chill while you are making the blueberry sauce.

Blueberry Sauce:

Place 1 container (8oz) blueberries in a medium size saucepan.

Add in:

1/2 cup fruit juice

Bring to a boil and reduce heat so that it simmers. Stir frequently. When about half of your blueberries have popped their skin add in a mixture of:

1 tablespoon cornstarch

1/4 cup water

I don't always need the whole amount of cornstarch mixture. It depends on how thick you'd like your sauce. I add in about half, stir, and determine if I need more. Remove sauce from heat.

Once the sauce has cooled, pour it over the cream cheese filling. Chill and serve!

I hope you enjoy these delicious summer recipes! Regular programming will now ensue...

*Post from 1 year ago today: Wordless Wednesday - Belly Flop!

Labels:

Tuesday Recipe: Cream Puffs
I know, you want the Boston Cream Pie recipe. I'll write it up, I just want to make it first so I can include pictures.

Today, today we are talking about Cream Puffs.

This dessert is incredibly simple. But it sure does present beautifully! And serving Cream Puffs feels quite special. So, if you are in the mood for a non-fruit, amazing tasting dessert, need it to be something fairly fast but want it to look as though you slaved over the dessert for hours upon hours... I've got your back.

Actually, could we switch backs? Mine is so tight right now... The Crossfit workout Daniel and I did tonight kicked my butt.

Moving on... Cream Puffs. Here we go!

First you need to make the Pastry Cream because this needs to chill.

Coincidentally, this is the same cream you'll be making for the Boston Cream pie. It is so, so good.

In your mixing bowl beat on high speed until thick and pale yellow (about 2 minutes):

1/3 cup sugar

2 Tablespoons all-purpose flour

2 Tablespoons cornstarch

4 large egg yolks

While your eggs etc. are getting a good whipping combine in a medium saucepan and bring to a simmer (you'll be adding the egg mixture into this pan so make sure it's big enough):

1 1/3 cups milk

1 vanilla bean ( I skip the v. bean)

Gradually pour one-third of the hot milk into the egg mixture, stirring to combine. Scrape the egg mixture back into the saucepan and cook until custard is thick. Stir constantly!! Cook until for 45-60 seconds after the mixture is thick and bubbly. Remove from heat. Add in:

1 teaspoon vanilla ( I always add 1 teaspoon more cause I'm a rebel and I love vanilla)

I stir the pastry cream for a few minutes to cool it down a bit. Once it isn't piping hot anymore, lay a piece of saran wrap over the top to prevent that nasty skin from forming. Chill.

Okay, now you need to work on the Choux Paste (choux sounds like shoe and means cabbage which is so not the look or taste we are going for here. So, please forget I ever enlightened you on the finer points of Choux)

Put into a medium sized saucepan:

1/2 cup milk

1/2 cup water

8 tablespoons butter , cut into 8 pieces

1 Tablespoon sugar

3/4 teaspoon salt

Bring this mixture to a full boil, stir frequently. As soon as the butter is melted, pour in:

1 1/2 cups flour

Stir vigorously until the flour is completely incorporated. Keep stirring for another 30 - 45 seconds until the dough forms a ball and the bottom of your pan has a light crust. Remove from the pan and place in your mixing bowl.

Immediately add in, one at a time, 5 eggs . Mix on low speed until incorporated and then add the next one. When you are finished you should have a shiny, smooth dough.

Place this dough in a pastry bag with a 1/2 inch tip - or if you are normal like me and don't have one - use a ziploc bag that you cut the corner off to make a half inch hole. Shape your dough into puffs on an ungreased baking sheet. They should look like this:


Bake for 15 minutes at 400 degrees. Reduce your oven temperature to 350 degrees and bake for 10-20 minutes more - the puffs should be golden and very firm to the touch.


Remove and cool on a cooling rack.

Alright! Now we are onto the chocolate sauce. This sauce absolutely makes the Cream Puffs. You can not eat a Cream Puff without chocolate sauce - it's just not done!

In a double broiler (or a metal bowl atop a pan with a couple inches of boiling water in it) combine:

6 oz bittersweet or semi sweet chocolate (Use something good - you won't regret it!)

6 Tablespoons water, milk, or fresh coffee

Remove from the heat once this is melted and smooth. Stir in:

6 Tablespoons unsalted butter (Don't use the salted kind. Blech!)

1/4 cup powdered sugar - or until it's sweet enough for you

Continue to stir until perfectly smooth. It will be a thing of beauty. I can assure you of this.

Okay... the putting together of your Cream Puffs. Since I'm normal and I don't have a pastry bag (though, admittedly I would love to have one!) I cut my puffs in half, fill with cream, and then put the puff back together. If you had a pastry bag you could pipe the cream into the puff.

Once you've filled the puffs and placed them on your serving platter, drizzle the chocolate sauce over the top. Absolute deliciousness!


Enjoy! And, please, let everyone think you slaved over these Cream Puffs. It's more fun that way.

Labels:

The Stir Fry recipe - and a couple explanations
Okay, I tried. I really did, but I just can't finish my "walk with me" post right now. I've gotten to Thursday, but I'm just not feeling it. So, instead I am going to give you my "Stir Fry" recipe.

On another note.... A commenter asked me to talk about healthy eating and cooking from scratch. I am excited to do this! I am going to do this in a series form because I don't want to bore those of you who aren't interested. Plus, I've found it's easier to assimilate smaller forms of information. Wouldn't you agree?

I am also working on a series on how to incorporate more health into your diet in easy, simple ways. First up is whole grains. I have that post nearly finished, so look for that in the next couple of days.

I am really enjoying putting together this information. It's not so much scientific, but instead it's practical, easy to incorporate into daily life, and not off the deep end healthy.

You ready for that recipe? Okay here we go:

Andrea's "Stir Fry"

3 chicken breasts cut into bite size chunks ( this is for feeding four tummies)

Cauliflower ( 3 cups of bite size pieces)

1 can pineapple chunks/tidbits, semi-drained

1 red pepper ( cut up into bite size pieces)

2 cups cashews

2 cloves garlic minced

1 medium onion - sliced medium

4 cups cooked brown rice

**Optional: a couple handfuls of sliced green onions

Sauce:

Combine in small bowl -

1 cup chicken or vegetable broth (I use Imagine Organic chicken broth)

1/4 cup soy sauce (I use San-J)

1/4 cup Teriyaki sauce ( again, San-J)

1 Tablespoom Sesame oil

3/4 teaspoon salt

1T sugar

2 T cornstarch

1/4 teaspoon red pepper

In a wok or a large skillet ( with higher sides) saute the onion and garlic in oil over medium heat. When translucent remove. Set aside in a small bowl.

Saute chicken with a couple tablespoons oil over medium high heat until cooked through. Set aside.

Add onions and garlic back into pan. Add in all the remaining ingredients except the cashews. Pour the sauce over veggies/fruit and cover. Cook until crisp tender. Add in chicken and cashews. Stir and serve over the brown rice.

See how easy that is! This is one of my "go to meals" because I pretty much always have the ingredients and it's simple.

I hope you enjoy this meal!


Labels:

Roasted Sticky Chicken
I really love Costco. As if you didn't already know that. And I really, really love Costco's whole chickens. Great price, great packaging (no leaks) and you get two! But, there is one thing I hate about those chickens... the giblets aren't bagged. I have to reach in the cavity (yuck - what a gross word) and pull out the "stuff". I hate the "stuff". It skeeves me way out. I had to do it twice today because I was roasting two chickens.
Which brings me to my point... a recipe. Not only is this a really delicious roasted chicken, the broth you can make from the leftovers is amazing. The best ever. You'll never taste such delicious chicken soup as you will made from a leftover roasted sticky chicken. Let me just clarify - there is nothing sticky about this chicken. Yet, sticky is part of the name. Weird, huh! Anyways... here is the recipe:

Roasted Sticky Chicken

combine:

2 teaspoon salt

1 teaspoon paprika

1/2 teaspoon cayenne pepper

1/2 teaspoon onion powder

1/2 teaspoon thyme

1/4 teaspoon garlic powder

1/2 teaspoon black pepper

1 large onion, quartered

Clean one whole chicken. Rub spices on the inside and outside of the chicken. Stuff the cavity (again, gross!) with onions. Roast uncovered at 250 degrees for 5 hours. Baste a few times during the cooking.

The prep time is like 5 minutes. It goes together SO quickly. I love that - I don't have time to mess around with complicated meals right now.

And I know, it takes 5 hours to cook, but that's the secret. I am doing mine at 300 degrees for 4 hours today because I didn't get it in early enough. But don't go higher than 300 degrees. It won't work. This is a great meal if you need to bring food to a friend because you can make two together - one for you and one for them.
Oh, and the smell that fills your house is worth every minute of those five hours.

Bon Appetit!

Labels:

Peanut Butter Honey Milk Balls: A Recipe Especially for Kids
Though this is a very kid friendly recipe, I might secretly want to hoard them all for myself and never, ever share. But, since I do love my children, I share. If you are so inclined you can even have your kids help you make them. Eve helped me the other night and had a lot of fun. These peanut butter balls are a great source of protein and is easy to bring along for a snack on the go.

Honey Milk Balls

1/2 cup honey
1/2 cup peanut butter
1 cup dry milk powder
1 cup uncooked rolled oats

Mix it all together well. Shape into small balls.
Refrigerate. Makes about 2 dozen.


Variations: I sometimes use quick oats instead of the rolled oats. I also really love to chop up chocolate chips ( carob for the kids) and mix them in. The kids LOVE that! And sometimes I like to roll the balls in crushed graham crackers - makes them especially yummy! Enjoy!

Labels:

Recipe for Biscuits
I am about as Northern as they come. I was born and raised in New York but then married Daniel and moved to Alaska. Off we went to North Dakota and now I'm living in Vermont. You can plainly see I've got the Northern thing down to a science.

All that being said, when it comes to biscuit making I will happily step aside in respect to a Southern woman who can really make biscuits. But, until that happens, I will give you my pretty much never fails, delicious biscuit recipe.

There are a couple of different ways to make these fluffy creations. I always make my biscuits with heavy cream instead of with the traditional butter and milk. They feel less fattening (please don't take that to mean they are) and are a whole lot quicker to make.

Because I love you, I will provide you with both ways of making the biscuits. I do realize not everyone is like me in my consideration of heavy cream being a refrigerator staple.

Biscuits

2 cups flour
3 teaspoons baking powder
1/2 teaspoon salt
3/4 - 1 cup heavy cream (or much as needed)

Mix the dry ingredients together. Add in the heavy cream until your dough is slightly sticky. Knead on a floured surface 10-15 times to make a soft ball. Roll out to 3/4 inch thickness; cut into biscuits. Place biscuits on a cookie sheet, close together but without touching. Bake at 425 degrees for 10-12 minutes.

Now, if you want to use butter, substitute the heavy cream with 3/4 cup milk and 1/4 cup of butter, cut in with a pastry knife. Proceed with the next steps.

The biscuit cutter I use is a small plastic container with fairly sharp edges - highly professional, I know. The important part is that the top of this container is only 2 and a half inches across. I like my biscuits tall and very fluffy. A smaller biscuit will rise higher; choose your biscuit cutter with that in mind. I have used a small juice glass before and it works just fine.

One more thing, this is a basic recipe. You can add thyme and a little sugar to make delicious thyme biscuits, or perhaps some cheddar cheese; your creativity is the only limit.

Please, enjoy this Northern girl's version of a biscuit.

Labels:

Recipes for Scones and Sweet Potato Biscuits
My recipe on Tuesdays has dropped into the non-existent, hasn't it. I'm sorry about that. Here are the Sweet Potato biscuit and Orange Cranberry Cream scone recipes to try and make it up a little to you, and since you asked for them too.... Both recipes are incredibly quick and easy. The scones are always made when I have company over during the morning. They never fail to bring smiles.

Sweet Potato biscuits

Mix together:

2 cups flour
1Tablespoon baking powder
1/2 teaspoon salt

In separate bowl - mix:

1/4 cup oil
1 1/4 cup mashed sweet potato
2Tablespoons maple syrup

Combine the dry and the wet. The dough is very soft and somewhat sticky. You can sprinkle lightly with flour to help relieve the stickiness. Shape into a circle about 3/4 inch+ thick. Use a biscuit cutter or a small glass to cut out your biscuits. Bake at 400 degrees for 10-12 minutes.

(***trick - I always use a 1/4 cup or so of milk and 1 cup of sweet potato instead of the 1 1/4 cup sweet potato.)


Orange Cranberry Cream scones

Mix in medium bowl:

2 cups flour
1/3 cup sugar
1 Tablespoon baking powder
1/2 teaspoon salt

Add:

1 1/4 cup heavy cream
1/2 to 3/4 cup dried cranberries
1 tablespoon grated orange peel
Squeeze the juice of half an orange into bowl

Combine dry and wet. Knead gently in bowl between 5 to 10 times. On a lightly floured surface pat into an 8 inch circle. Cut into wedges and place on an ungreased cookie sheet. I brush cream on top of the wedges and sprinkle sugar over each of them. Bake at 425 degrees for 12 minutes.

(***Trick: I just add cream until the consistency is right. You want the dough wet but not real sticky.)

Labels:

Thursday Recipe - Linguine and Ham with Cheese Sauce
This is such a delicious dinner. I am a lover of pasta in any form, but this meal is one of my favorites, which is why I made it for my birthday aka the day calories don't exist. It comes together really quickly, thankfully, since I basically salivate from the time I toss the onions in the butter to cook!

Linguine and Ham with Cheese Sauce

1 8oz pkg linguine
4T butter (I used 2T. butter 2T. oil)
1 small onion finely chopped
2T white flour
1/2 tsp. salt
1/4 tsp. ground pepper
2 cups milk (I used whole)
1+/- cup frozen peas
1/2 pound ham - slice into strips ( I got mine from the deli)
1/2 cup swiss cheese shredded

Over medium heat cook the onion in butter, until tender. Stir in flour, salt and pepper until blended. Cook for one minute. Gradually add milk, stir until thick and smooth. (this takes quite awhile, causing me to panic every time thinking it won't thicken. It does, but it's just not a real thick sauce.) Add in peas, ham and swiss cheese. Stir until heated through and the cheese has melted. Serve poured over your cooked pasta.

The delicious non-calorie laden Boston Cream Pie Daniel (and I) made

Labels:

Tuesday Recipe

I decided to make the Mexican Rice and Beans for dinner since I had both sets of our parents coming tonight. It was so good, fast, and easy. This meal is always a crowd pleaser! I used a medium heat chunky salsa but you can easily tailor this meal for your specific tastes. I love corn bread as a side for this dish, although we had a cabbage salad tonight and it was delicious together.

Here it is:

Mexican Rice and Beans

2+ cups beans ( Kidney and Black beans)
1 1/2 cups corn (frozen)
1 jar of salsa
2 1/2 cups V8 juice
1 cup uncooked brown rice
1/2 teaspoon cumin
1/2 teaspoon oregano
3/4 teaspoon salt
Shredded cheddar cheese for the top (after cooked)

In a 9x13 inch baking dish place all the ingredients together and stir until mixed.
Cover with foil and bake in a 375 degree oven for 1 1/2 hours or until rice is cooked. Sprinkle your shredded cheese over the top of cooked casserole and place back in oven until melted.

Perhaps next week I will make the no bake trash cookies, simply to make Katie smile!

Labels:

Tuesday Recipe - Taco Bake
Hey, it's still Tuesday right?! I had an engagement tonight and I didn't get a chance to snap a photo of this meal before I left. But, between the four of us there is about one quarter of a 9x13 pan of Taco Bake left... it's really good stuff! I also made Schoolhouse Gingerbread which turned out amazing. Moist and so flavorful, although I am wishing I had been home tonight to make some applesauce, or perhaps some maple whipped cream to go along with it.

I would like your opinion - since this is all about you - would you rather have the recipe for a really easy Mexican Rice and Beans casserole (as in can be prepared and in the oven within 10 minutes flat) or a really gooey, sinfully delicious, incredible recipe for Unbaked Chocolate Oatmeal Trash cookies? Just let me know!

Here is the recipe for Taco Bake - remember this is the recipe that made Daniel realize he was truly glad he married me - we do simple, simple delicious food here.

Taco Bake

1 pound ground beef or turkey
1 package of taco seasoning
3 cups bisquick
1 cup milk
1 small green pepper - diced into small pieces
2-3 tomatoes - thinly sliced

Mix together and set aside:

1 cup sour cream
1 cup shredded sharp cheese
2/3 cup mayonnaise
1/4 cup onion finely chopped ( 1 small onion)


Cook the meat along with the taco seasoning and 1/2 cup water. Set aside when done.
Mix the bisquick with the 1 cup of milk and press into a 9x13 greased pan. Make sure to press up the sides a bit with the bisquick.
Spread the seasoned meat over the dough.
Sprinkle the green peppers over the meat,then lay the tomatoes over top of the peppers.
Spread the cheese topping over the tomatoes evenly.

Bake at 350 degrees for 35 minutes, or until edges start to brown slightly.

Okay, so I never said it was lowfat. I am sure there are ways to decrease the fat content of this meal, but I could never disrespect my Taco Bake in that way. If you can, look past the fat and see the two vegetables, the protein, and two sources of dairy. If you have done that, well then welcome to my world. It is a happy, well fed place to be.

Labels:

Tuesday Recipe - Gasp ...On Tuesday!
These chocolate chip cookies have made me friends everywhere- Seriously. They are awesome.
But, there are two particular things you must know about this cookie.

First, you have to use enough flour. If they are made with too little the cookie is flat. I don't particularly like a flat cookie - if you do then this may not be the recipe for you.
The second important factor is using enough chocolate chips, as in the entire bag. Don't be a tightwad - dump them all in. A bag is like $2.50. It's for the integrity of the cookie, or something like that.

If you do those two things your cookie will make men's hearts everywhere melt. I know because I've seen it happen with my own eyes.

Chocolate Chip Cookies

Cream together:

1 cup butter
2 cups sugar
(I use all turbinado, but you could use half white/half brown)

Add and then beat until fluffy:

2 eggs
2 Tablespoons hot water
2 teaspoons vanilla

Sift together and add:

3 1/2 cups all purpose flour
1 teaspoon salt
1 teaspoon baking soda

Now, add that whole bag of chocolate chips

Bake at 375 degrees for 11 minutes, add time if you like your cookie more done. I prefer mine a bit undercooked.

Just as an aside - you could use these cookies as currency. They will get you nearly anything that you could possibly desire. But, you didn't hear that from me, and of course I've never done such a thing...

Labels:

Chicken Cordon Bleu

I guess this week Thursday is the new Tuesday. My house smells so awesome right now, but the most wonderful part about making this meal tonight was the new tip I learned. Apparently it's best to make Chicken Cordon Bleu while eating chocolate cake. Great news, don't you think?!
Without further ado here it is:

Chicken Cordon Bleu
4 Boneless chicken bre*st
4 slices ham (from the deli) - medium to thickly sliced
4 slices swiss cheese - medium sliced (buy good quality cheese - it does make a difference)
3 cups bread crumbs
4 Tablespoons melted butter
4-6 Tablespoons oil
**Mix butter and oil together in a separate cake pan

First off I season my bread crumbs with:

1 1/2 teaspoons dried thyme
1/2 cup parmesean ( I used 1 cup freshly grated Romano)
1/2 teaspoon salt
1/2 teaspoon garlic powder
1/2 teaspoon ground pepper (or freshly ground pepper - just
grind until your arm gets tired, like I did)

Combine the bread crumbs and seasonings in a flat pan with sides (I used a brownie pan... mmm brownies)

Next, pound your chicken until thin (approximately 1/2 inch or less)
Lay on chicken one slice of swiss cheese
Lay on top of cheese one slice of ham
Roll inward starting from the smallest end to the widest end.
Secure with toothpicks.

Roll chicken in melted butter and oil mixture
Now roll in the bread crumbs. I really pat the bread crumbs on to the chicken - I like each one to be thoroughly covered!

Place on a cookie sheet covered in aluminum foil.
Bake for 30 -35 minutes at 350 degrees.

I had this on our table in an hour - it's amazing how this meal looks and tastes like I slaved over it when really I didn't. I did a little work and got to eat chocolate cake at the same time. My kind of dinner!


Labels:

Pumpkin Roll
This is an unchilled roll hence the gooey-ness. I also should have been more careful with my flour sprinkling so as to avoid the leopard look. The spots didn't affect the taste! :)

Pumpkin Roll

3/4 cup white flour
1/2 teaspoon baking powder
1/2 teaspoon baking soda
3/4 teaspoon pumpkin pie spice
1/4 teaspoon salt
3 eggs
1 cup sugar
2/3 cup pumpkin puree

Filling

1 (8oz) package cream cheese
1/3-1/2 cup sugar (can use powdered)
4 tablespoon butter
1 teaspoon vanilla

Beat together the eggs and sugar until thick and fluffy. Add pumpkin. Mix well. Combine all the dry ingredients and add to wet. Don't over mix this part.

Okay, now you want to lay a greased and floured piece of wax paper on a a 15 by 10 inch cookie sheet. Make sure it is well greased and floured, otherwise you'll be cursing yourself later.
Pour the pumpkin mixture on the wax paper and spread evenly. Make sure you get the batter to all the edges well. Pop that pan in the oven at 360 degrees for about 12-15 minutes. You are going to gently press your finger on the top of it to see if it's done. You are looking for slightly springy, not gooey or sticky.
While that is cooking you need to prep a large clean kitchen towel. Sprinkle the towel (laying flat) with either flour or powdered sugar.

Now comes the part where you have to move really fast. Take your cookie sheet with the cooked cake and carefully flip it over on to your floured towel. Quickly and carefully peel off the wax paper.
Now roll the cake together with the towel starting at the narrow end. Set your rolled cake on a wire rack and let it cool. It looks funny, but it really works this way.

Now, is filling time. Combine all the filling ingredients and cream together for 3 or 4 minutes. Until it is nice and fluffy. My mom sometimes adds sprinkles to this to make it fun.

When your pumpkin roll is cooled carefully unroll it and spread the filling all over it. Make sure to spread
to the edges. Roll it back up, minus the towel this time. Wrap in wax paper and chill for an hour, at least.
You could freeze it now or let it chill and eat it fresh. If you freeze it, wrap it in wax paper and foil. When you need a dessert, take it out of the freezer, slice and lay it on your serving dish. It will thaw, and you'll have a wonderful dessert!

Labels:

Tuesday Recipe - Morning Glory Muffins
These muffins are incredible. Really. I'm not just saying that. Moist, delicious, and healthy! Shhhh ......They even contain a vegetable. Perfect, don't you think? Here is the recipe:

Morning Glory Muffins

1 cup sugar
2 1/4 cups flour ( I do 1c. white and 1 1/4c. whole wheat)
1 Tablespoon cinnamon
1/2 teaspoon salt
2 teaspoons baking powder
1/4 cup molasses
1 cup grated carrots
1 apple grated
8 oz. crushed pineapple - drained
3 eggs
1 cup oil
1 teaspoon vanilla

1/2 cup pecans broken into small pieces -optional

Directions:

Sift together the first six ingredients in a medium bowl.

In a separate bowl whip eggs, oil, and vanilla.

Pour wet ingredients into the dry ingredients. Add the carrots, apple, pineapple and nuts. Mix well.

Pour into greased or papered muffin tins. Bake at 350 degrees for 25 minutes. The muffins might need a few minutes longer to bake should you use a muffin tin with an over-sized cup.


Labels:

about us
miscellaneous
previous
archives
military
miscellaneous
miscellaneous
post labels
credits